 |
Still my favorite propaganda poster of all time
It's like, "Kilroy was here, but EVIIIIL" |
Ahhh, another weekend another battle against fellow
WWPD Forum Pyrrhic Victory. This time he's posting up with the famous 11th Armored division. The
FlamesOfWar.com website
describes them as:
"A flashing rapier that cut into the heart of the German defenses."
And yeah, they kind of did that during this bat rep as well.
I, on the other hand, will be taking a new iteration of my trusty
Panzer Lehr Panzergren's.
The Run Down
Mission: Cauldron
Points: 1780
Attacker: 11 AD (From
Taurus Pursuant PDF)
Defender: Panzer Lehr (From Earth & Steel)
The Lists!
11th AD:HQ: 1IC Sherman V with .50 Cal, 2IC Sherman V with .50 Cal
Combat Plat 1: 3x Sherman V 1x Firefly with .50 Cal
Combat Plat 2: 3x Sherman V 1x Firefly with .50 Cal
Recce Patrol: 4x Stuart 5 Jalopy
Brigade Support: Rifle Platoon
Div Support: 4x M10
Div Support: 2x Daimler 1x Sawn off Daimler
Panzer Lehr:
HQ: 2x Cmd w/Track
Combat Plat 1: Full Panzer Lehr Platoon
Combat Plat 2: Full Panzer Lehr Platoon
Weap Plat 1: 4x Heavy Mortars
Weap Plat 2: 2x Pak40
Weap Plat 3: Full Panzerpio Lehr with 3 extra Half Track & 2x Stuka ZuFuss
Div Support 1: 3x Puma, 3x Puma
Div Support 2: 4x Panzerwerfer 42 w/extra Crew
 |
| German Deployment and British Objective Placement |
 |
| British Deployment |
 |
| German Recce Move |
 |
| British Infantry steps off |
 |
| And the tanks swing around the corner of the woods, and pop two Pumas |
 |
| Ouch |
 |
| The third fails his morale and flees. |
 |
| Jalopy's crest the hill |
 |
| And the british infantry keeps advancing |
 |
| Jalopy's open up on the Pak40's (who were in immediate ambush) but fail to score a kill |
 |
| The Sherman V's take their turn on the 40's |
 |
| Scoring 1 kill and pinning the platoon |
 |
| The Brit PBI inches up on the oberservers ready to assault |
 |
| The Assault! |
 |
| Takes one of the mortar observers... |
 |
| The other oberserver flees closer to his friends |
 |
| Feeling threatened the Lehr platoon "presents" it's half tracks, warding off an infantry assault |
 |
| The Pak40 unpins and opens up on the Sherman's |
 |
| Bailing 1 (facepalm) |
 |
| Second Sherman Platoon arrives from reserve |
 |
| Seeing a tough assault option, the Brits choose to dig in instead |
 |
| The freshly arrived Sherman's begin to pressure the second objective |
 |
| The Sherma's finish off the Pak 40s' |
 |
| But the situation stabilizes across the front |
 |
| British recce, cleverly disguised as US recce, show's up to support the tanks |
 |
| The grenadiers sit tight as the Jalopy's come over the hill looking for some kills |
 |
| Bailing 1 half track (the platoon makes its save and sticks around) |
 |
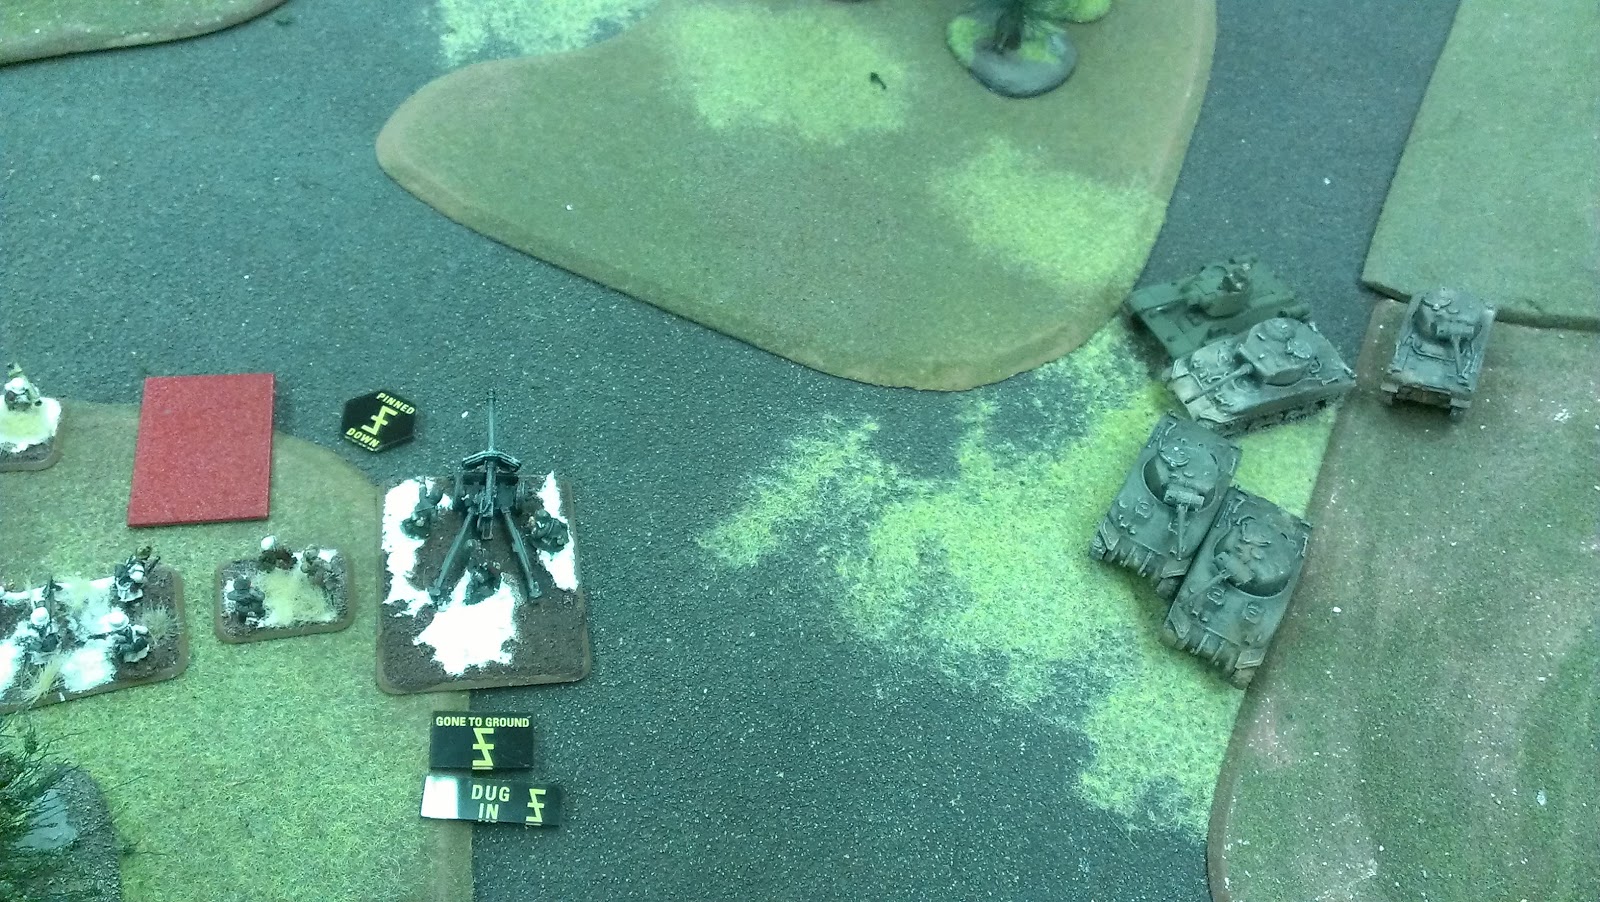
| Concentrated MG fire from two platoons of Tanks scores it's first kill on the rear Lehr platoon |
 |
| German Pio's arrive from reserve |
 |
| And book it into the trees with only the Stuka ZuFuss to support |
 |
| Jalopy's reverse course to meet the threat |
 |
| As one of the recce vehicles skirts around to set up GTG removal |
 |
| And, the M10's arrive |
 |
| Stewarts open up on the Pio's, scoring two kills and pinning them out. |
 |
| The two Sherman Platoons take out two more stands from the platoon protecting the rear objective |
 |
| Puma's arrive, looking for some payback |
 |
| And score a Kill! (that's not another objective) |
 |
| But the Shermans and recce begin the full court press on the rear objective |
 |
| And the M10's swing around looking for some justice for their buddy |
 |
| The Jalopy's nix the ZuFuss's (ZuFae?) and keep the pios pinned. (They also fail to dig in) |
 |
| The M10's open up with their .50 cals scoring two his, but the Puma's make both saves! |
 |
| The Pio's however take a beating and are forced to flee |
 |
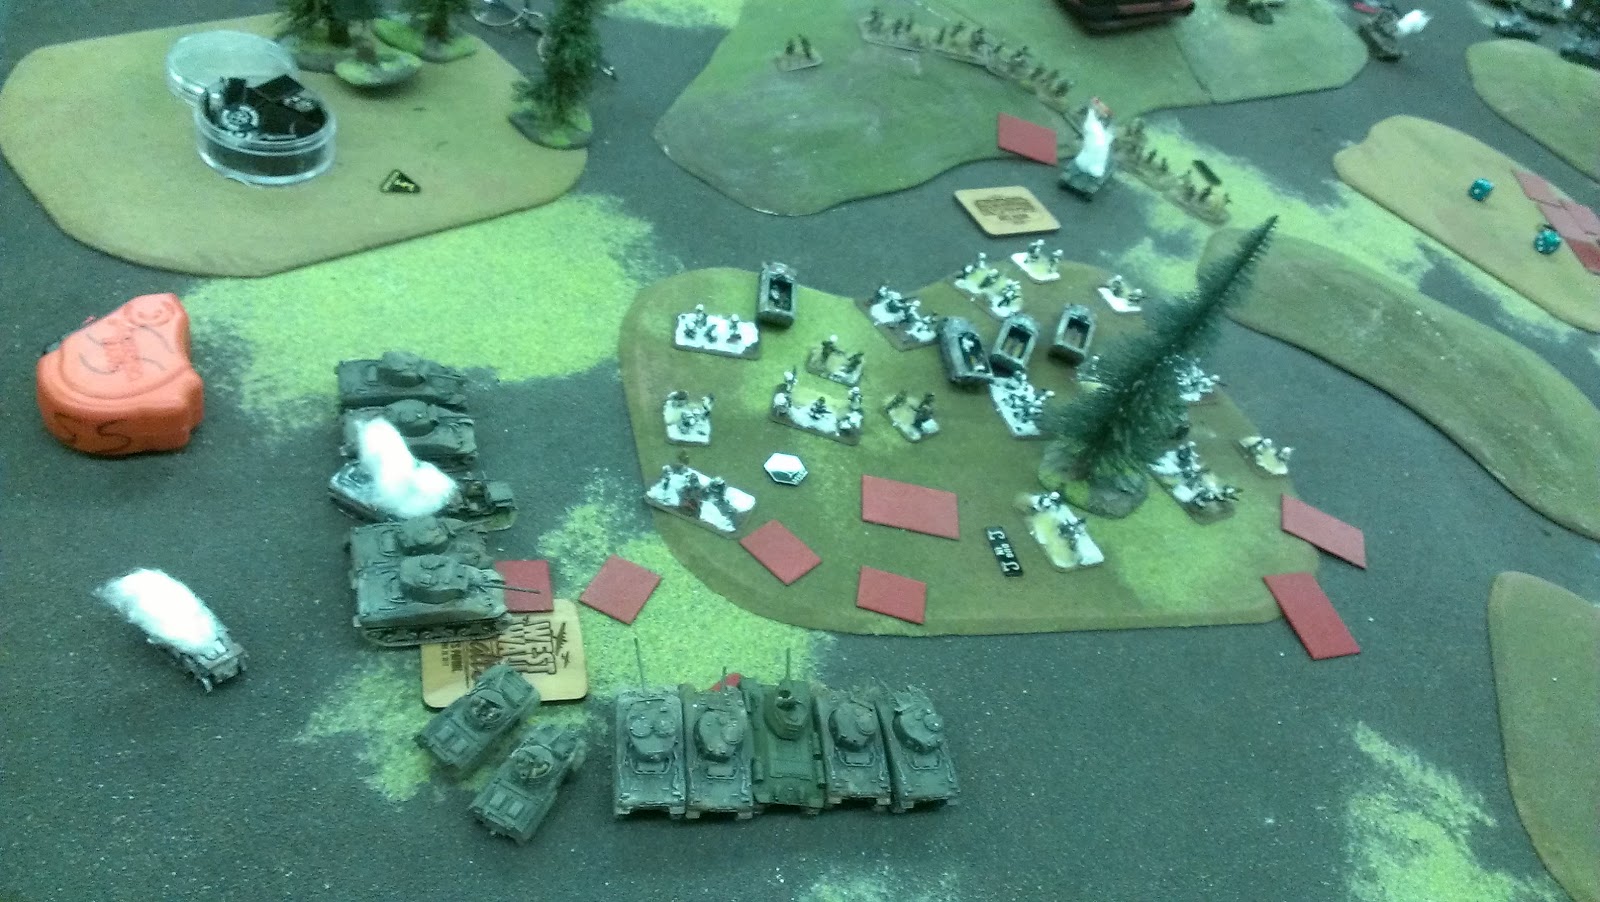
I attempted to stormtrooper my troops back into the woods, but I failed and one was left hanging out in the open.
This lead to disaster on my rear objective as the tanks and recce took their toll. |
 |
| Pioneers Flee |
 |
| Heavy mortars show up, far too late. |
 |
| But! My plucky tank hunters take out the British 2IC. |
 |
| And the Puma's score another kill and a bail on the M10's. |
 |
| Epic Puma action continues as the stewarts open up on them |
 |
| And between them and M10's only bail 1 tank. |
 |
| However, the other front is collapsing. |
 |
| And this pretty much heralded the end of the game. |
Final Thoughts:
And that's all she wrote folks. So what did we learn. First, my list was less than optimal. Two units of Puma's really isn't necessary Nor should I have deployed them on the hill. I forgot you only get 4 inches of movement with wheeled vehicles, I am a bonehead. Second, it probably would have been better for me to deploy entirely in the trees with both platoons, this would have forced Pyrrhic to come within six inches. Where my shorter ranged AT could reach out and touch him (but not like that, sicko). I also don't think I need Panzerwerfers and heavy mortars. For Pyrrhic, we decided there was one thing he probably could have done differently, perhaps he should have brought out his recce from reserves before the second tank platoon. Given my deployment, it wouldn't have been an issue to get rid of my gone to ground and still do damage with the tanks. He could have possibly rolled the bottom quicker. Not a game breaker by any stretch, just a different and perhaps slightly more optimal choice.
This scenario is a toughy for the defender as your starting assets are deployed on one side of the board and all reserves come in from the opposite. This means that it is critical that you find a way to secure those reserves and bring them to bear before a more mobile force (like light tanks) can roll up and take their toll. If not, the attacker will be able to defeat your reserve platoons in detail and rack up the victory points.
All in all, playing with Pyrrhic is so much fun, and I learn so much that I don't mind losing at all. Thanks again for a great game. And thank you all for reading!


Great report
ReplyDeleteNice report. I am curious though. You knew that you were going to face down armor but did not have a lot of AT assets. On the other hand, you did take a respectable amount of artillery. What was your plan?
ReplyDeleteGreat Batrep, tough mission with a tough opponent. Nice table and minis
ReplyDelete